
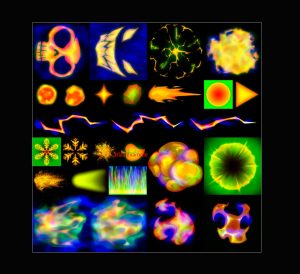
Visual effects (VFX) can be beautiful, powerful, and complex. But even the best effect can break your game’s performance if you don’t think about optimization. In this article, we’ll explain the most important things about Niagara optimization: emitter count, material complexity, batching, shader instructions — and give real examples from practice.
The current version of the Unreal Engine for this article is 5.5. Therefore, all information is relevant for this version.
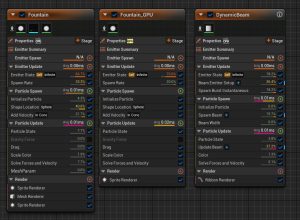
Part 1: Number of Emitters — Is Less Always Better?
Is “fewer emitters = better” true?
Yes — most of the time, this is true. But with some details.
In Niagara, each Emitter is a separate system that updates every frame. More emitters = more updates = more load on CPU or GPU (depending on simulation type). That directly affects your performance.
What you gain by combining into one emitter
Fewer NiagaraComponent objects in the scene
Fewer TickComponent calls
Easier to reuse logic (for example, same spawn logic)
Better data caching — fewer instances = fewer calculations
Sometimes fewer draw calls (especially if using one material)
Test Results in Practice
Epic Games (at GDC) showed: 1 emitter with 1000 particles is often faster than 10 emitters with 100 particles each.
Example:
One emitter with Sprite + Mesh → OK if using same logic
Add Ribbon, Beam, or GPU Events → better to split emitters
Practical Tips
Combine Sprite + Mesh if logic is the same
Keep Ribbons separate (they need special sorting and direction setup)
Don’t mix GPU and CPU emitters
Use User Parameters to pass values between emitters
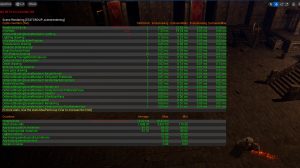
Use Niagara Debugger and stat Niagara, and press
Ctrl+Shift+Commato profile on GPU
Performance Table
| Number of Emitters | Niagara Cost (ms) | Draw Calls |
|---|---|---|
| 1–5 | ~0.3–0.6 | 1–2 |
| 10–15 | ~0.8–1.2 | 3–5 |
| 30 | ~1.5–2.5 | 6–10 |
What saves Niagara performance?
| Optimization | How much faster |
|---|---|
| Combine emitters | 10–25% less CPU time |
| CPU → GPU (many particles) | 30–50% less CPU time |
| Fewer Events | Up to 50% faster Niagara tick |
| Reusing materials | Fewer draw calls |
| Ribbon ID optimization | Fewer artifacts, but more logic cost |
⚠️ Note: GPU emitters are great only if you spawn a lot of particles (over 1000). If you only need 1–100particles, use CPU emitter — GPU simulation has extra cost for small amounts of particles.
Summary
More than 10 emitters can cost more than 1 ms on CPU
Better to merge logic into 3–4 well-organized emitters
Can save up to 30–50% Niagara cost
But don’t sacrifice readability or modularity — especially for complex effects
Comparison: Standard Emitters vs Lightweight Emitters
Lightweight Emitters are a new experimental feature in Unreal Engine. Their goal is to make Niagara effects faster and easier to scale — especially when you need thousands of simple particles like sparks, dust, or small magic.
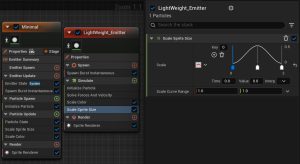
They reduce CPU cost by removing complex features.
But they are not fully ready for production use yet.
Limitations (at the time of writing):
❌ No Ribbon, Beam, or GPU Events
❌ No User Parameters
❌ No custom Niagara modules
❌ Only supports Sprite Renderer
⚠️ Interface and workflow still feel “work in progress”
Epic Games is actively working on improving them. In the future, Lightweight Emitters may become the best choice for fast and simple particle systems.
Performance Comparison
| Feature | 10 Standard Emitters | 10 Lightweight Emitters |
|---|---|---|
| Niagara CPU Cost (ms) | ~1.2 | ~0.4 |
| GPU Cost (ms) | ~0.6 | ~0.3 |
| Ribbon / Events Support | ✅ Yes | ❌ No |
| Material Options | Full support | Only simple sprites |
| Batching | Partial | High |
Use Lightweight Emitters when:
You only need simple visuals
You don’t need logic or animation
You care about high performance (mobile, mass VFX)
Avoid them if:
You need Ribbon effects, complex events, or per-particle control
⚠️ This comparison is based on internal tests with 1000+ particles and may vary depending on your project and Unreal Engine version.
Part 2: What is Batching and Why Are Draw Calls Important?
What is batching?
Batching means rendering many objects in a single draw call — one command sent from CPU to GPU. The fewer draw calls, the better your performance.
Unreal Engine can batch Niagara particles if:
They use the same master material
They use the same render type (Sprite, Mesh, Ribbon)
They use the same texture or a texture atlas
Differences between them are only dynamic parameters, not static switches
Example: 5 emitters using the same texture atlas and material can become 1 draw call instead of 5.
How draw calls work in Niagara
| Situation | Can it batch? |
|---|---|
| Same master material + dynamic parameters | ✅ Yes |
| Different master materials | ❌ No |
| Static Switch or Static Bool | ❌ No |
| Different textures (not atlas) | ❌ No |
| UV offset inside one texture atlas | ✅ Yes |
Best Practices for Batching
1. One Master Material per category
Create a clear structure:
MFX_Sprite_Master– for spritesMFX_Ribbon_Master– for ribbonsMFX_Distortion– for distortion (usually separate)
This avoids duplication and makes materials easier to optimize and reuse.
2. Avoid Static Switch
Static Switch means a new version of the shader will be compiled. Even if it’s one small bool — it breaks batching.
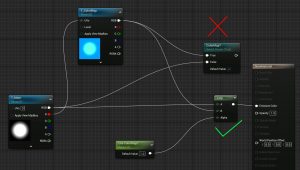
Use Lerp or If nodes instead:
3. Use Material Instance Dynamic
Change particle color, brightness, UV, or flipbook frame via:
Scalar parameters
Vector parameters
Texture atlas (same texture, just shifted UVs)
This lets you create many variations without breaking batching.
4. Use Texture Atlases
Instead of 10 separate textures, pack them into 1 atlas (e.g. 4×4 = 16 frames).
Then shift UVs using Niagara (with SubUV Animation or Dynamic Inputs).
Tip:
UV = BaseUV / 4 + Offset;
This way you can have many effects using the same material and texture → 1 draw call.
Heavy Nodes to Avoid in Pixel Shaders
| Node | Cost |
|---|---|
| SceneColor | ❗ Very high |
| Distance Field | ❗ Heavy |
| Refraction | ❗ Slow |
For most VFX, simple Unlit materials are enough:
Multiply,Lerp,Alpha Clip,Mask
Does Material Instance create a new draw call?
No, if:
It’s an instance of the same Master Material
All changes are dynamic (scalar/vector/atlas UV)
Render type is the same
Yes, if:
Static Switch or Static Bool is used
Different texture assets (not atlas)
Different blend mode or render settings
Summary Table
| Parameter Type | Breaks batching? |
|---|---|
| Scalar Parameter (float) | ❌ No |
| Vector Parameter (color) | ❌ No |
| Texture Atlas (same asset) | ❌ No |
| Different texture asset | ✅ Yes |
| Static Switch | ✅ Yes |
| Different blend mode | ✅ Yes |
Final Tips
Batching = fewer draw calls = better performance
Use atlases + UV offsets where possible
Avoid Static Switches
Keep materials modular and reusable
Remember: batching is not just Niagara — it’s also about materials and textures
Are Texture Atlases Still Useful Today?
Technically, combining multiple textures into one texture atlas can reduce the number of draw calls a lot. For example, you can create a 4×4 grid (16 options) and control the UV offset in Niagara to display different parts of that atlas.
Let’s be honest: in modern PC and console projects, texture atlases are rarely used anymore — not just because of the reduced texture quality, but also because as hardware performance has improved, most developers now prefer the faster and easier approach of simply using individual textures instead of optimizing with atlases.
This choice simplifies the workflow and speeds up development, even if it technically means more draw calls and lower performance.😔
Example:
A 4×4 atlas in 2048×2048 resolution = each tile is only about 512×512pixels.
That’s small for high-quality VFX that appear big on the screen or need detail (especially for PC and consoles).
Sure, you could use a 2×2 atlas or a non-square 1024×2048 atlas — but that’s harder to manage and not very common. Most VFX artists today just use separate textures at 512–1024 px, because:
It’s faster
Easier to control
Flexible for different effects
Where Atlases Still Make Sense
On mobile platforms, where every draw call and every MB of VRAM really matters — atlases are still super important. They help to:
Reduce draw calls
Save memory
Keep the game running smoothly even on older Android/iOS devices
Conclusion
Mobile games → texture atlas = must-have
PC / Console → use only when textures are small or repeatable
In most professional VFX workflows today, artists use individual textures (512–1024 px) combined with a shared master material and dynamic parameters for flexibility and batching.
Part 3: Shader Complexity — How Many Instructions Are Okay?
Shader Complexity shows how many operations the GPU must perform to render each pixel. In VFX, the most important part is the Pixel Shader, because particle effects often use translucent materials that are expensive to render.
What is “Shader Instructions Count”?
PS Instructions (Pixel Shader) – most important for VFX
VS Instructions (Vertex Shader) – less critical for particles
The more instructions → the heavier the material → lower FPS (especially on big, bright, or overlapping effects).
Recommended Instruction Limits (Approximate)
| Platform | Recommended | Max Limit | Notes |
|---|---|---|---|
| PC High-End (RTX) | 250–300 | 400+ | Ok if the effect is not full-screen |
| PC Low-End / Laptops | 180–220 | 300 | Avoid heavy post-process |
| PS4 / Xbox One | 180–220 | 250–280 | Sensitive to overdraw |
| PS5 / Xbox Series X | 250–350 | 400+ | More flexible, still be careful |
| Mobile (iOS/Android) | 80–120 | 150–180 | Even simple effects can lag |
| WebGL / HTML5 | 70–100 | 120 | Very limited |
| VR/AR | 100–150 | 200 | Renders everything twice! |
⚠️ These are guidelines, not hard rules. Always test in your real scene.
What Increases Shader Complexity?
| Node / Feature | Estimated Cost (Instructions) |
|---|---|
| SceneColor | +40–80 |
| Refraction | +20–40 |
| DepthFade / Distance | +15–30 |
| Texture Sample | ~4–6 |
| Smoothstep | +10–15 |
| Multiply, Lerp | ~1–2 |
| Dithered Opacity | +10–15 |
| Custom HLSL | Depends on your code |
Should You Use One Heavy Material or Many Light Ones?
This is always a balance between:
Shader cost (per pixel)
Number of draw calls
Overdraw
Type and size of effect
When One Heavy Material is Better (with Batching)
| Situation | Why it’s better |
|---|---|
| Emitters look similar (just color or brightness change) | One material can handle all via parameters |
| Using atlas + UV shift | Keeps batching |
| Small particles (like sparkles) | Overdraw is the main issue |
| GPU Niagara with 1000+ particles | Reducing draw calls is critical |
Even a 250-instruction material is fine here if it saves you from doing 10 separate draw calls.
When Many Lighter Materials Are Better (No Batching)
| Situation | Why it’s better |
|---|---|
| Very different effects (smoke, lightning, fire) | One material would be too complex |
| Big particles (taking large screen space) | Heavy material affects too many pixels |
| Low-end/mobile support | Shader cost is more important than draw calls |
| Different blend modes or meshes | Batching doesn’t work anyway |
Comparison Table
| Setup Type | Shader Cost | Draw Calls | Best For |
|---|---|---|---|
| One universal material | ~250 | 1 | GPU Niagara, many similar FX |
| Multiple light ones | ~100–120 | 5–10 | Unique FX, large screen effects |
Suggested Material Structure
| Particle Type | Frequency | Screen Size | Material Type | Shader Complexity |
|---|---|---|---|---|
| Sparkles / Noise | Often | Small | Super light | ~60–90 |
| Smoke, Trails | Medium | Medium | Custom | ~120–200 |
| Hero FX / AOE | Rare | Large | Complex | ~220–300 |
Practical Tips
For small particles: use simple
Unlit, 1 texture sample, no SceneColorFor mid-size: add erosion, emissive, UV offset
For large FX: SceneColor or Refraction is okay — but keep screen area small
Organize master materials by type:
MFX_Sprite_Standard,MFX_Distortion, etc.
How to Check Shader Complexity
Use Lit > Shader Complexity in viewport
Use
stat scenerenderingand check PS instructionsOpen Material Editor > Stats > Instructions
Key Takeaways
Shader Complexity alone doesn’t define performance — size on screen matters too
A 300-instruction material is fine if it’s small and used once
But if it covers half the screen → big FPS drop
Always test in-game, especially when combining multiple translucent particles
Part 4: What Is Overdraw — and Why You Should Worry
Overdraw happens when the GPU needs to render the same pixel many times, one layer over another. In visual effects (especially with translucent particles), this is a huge performance issue.

What Is Overdraw?
Overdraw means one pixel is shaded multiple times because:
Particles overlap each other
Translucent materials do not discard pixels
Effects like smoke, magic, and glows are stacked in the same area
Each time a pixel is drawn again, the GPU does more work. If the same pixel is drawn 5 or 10 times — that’s 5x or 10x the cost.
Examples of Overdraw
| Effect Element | Estimated Overdraw |
|---|---|
| Small sparkle | 1–2x |
| Magic cloud / smoke | 5–10x |
| Large AOE effect | 10–20x+ |
The more particles on top of each other, the worse it gets.
Cutout for Overdraw Optimization
One great way to reduce overdraw in Niagara is to use a cutout texture (or alpha erosion). Instead of rendering the full rectangular sprite (even if most is transparent), you can clip the shape with a mask.
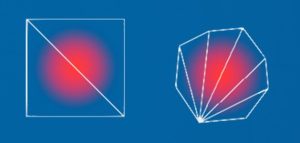
💡 This is how it helps:
You reduce the area each particle covers
The GPU processes fewer pixels
Less pixel blending = better performance
Yes, it creates a bit more geometry (extra vertices), but it’s a small cost compared to the overdraw savings.
Example: a circular flame sprite using a cutout will render only the actual flame shape, not the empty corners of the square texture — saving thousands of unnecessary pixel calculations.
When Should You Worry About Heavy Materials?
| Situation | Danger Level |
|---|---|
| Small particles with 300 instructions | 🟢 OK |
| Medium effect with partial stacking | 🟡 Depends |
| Large AOE or full-screen with 250+ instr. | 🔴 High risk |
| Stacked translucency + SceneColor | 🔥 GPU meltdown |
How to Avoid Overdraw Problems
Keep big effects simple: use max ~100–150 instructions
Use Unlit + Clip for efficient particle shading
Move heavy features (SceneColor, Refraction) into separate systems with their own timing
Use Depth Fade to hide close, invisible particles
Avoid full-screen translucent layers with noise or glow — prefer Decals or Fading Meshes instead
How to See Overdraw in Unreal
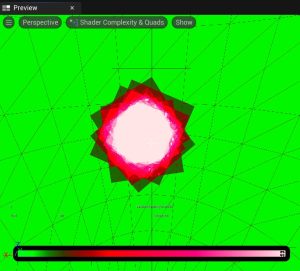
Use Shader Complexity or Quad Overdraw mode in the viewport
Green = good, red = warning, white = GPU pain
Use
ProfileGPUto check which materials are causing the most cost
Final Notes
Shader complexity is only one part of performance
Overdraw + expensive shader = worst combo
If the effect is small and short → 250 instructions is fine
If the effect is big or part of the background → keep it under 100–150
For stacked particles → try cutouts and use batching carefully
Final Summary
Niagara VFX optimization is not just about frames per second — it’s about building scalable, high-performance effects that look great and run smoothly across platforms.
Always test, profile, and analyze. What works for PC might not be good for mobile or VR.
Combine smart batching, good shader practices, and minimal overdraw.
Less emitters = better, but don’t sacrifice clarity and structure.
Use dynamic material instances, avoid static switches, and share master materials when possible.
Keep particle materials simple — especially for small or overlapping effects.
Monitor shader instruction count and how much screen space your VFX cover.
Use cutouts and masking to reduce GPU pixel shading load.
⚠️ Note from an Epic Games/Unreal Engine Team
After publishing this article, we received valuable feedback from a member of the Epic Games team. Here are a few important clarifications to ensure accuracy for anyone diving deeper into Niagara optimization:
1. Reducing Emitter Count
Reducing the number of emitters does not directly reduce component counts or TickComponent calls.
What it actually does is reduce the number of emitters that need to tick on the Game Thread or concurrently – which means fewer VM invoke or GPU dispatch per frame.
Additionally, combining emitters (e.g. through emitter partitioning) can help optimize performance by keeping more particles in a single emitter, which reduces the cost of spinning up or shutting down simulations.
2. Auto Batching in Niagara
Auto batching is not supported for dynamic draws, which Niagara (and Cascade) uses.
Unreal Engine’s batching system only applies to static draws, so combining materials and sprite settings won’t result in auto-batched draw calls for Niagara particles.
If you want to optimize draw calls, the recommended method is to push more into single systems using data channels, etc.
3. Lightweight Emitters (as of UE 5.6)
Contrary to the initial version of this article, Lightweight Emitters now support the following:
Ribbons
Mesh Renderers
Sprites
Decals
Lights
Note: “Beams” as a separate renderer do not exist in Niagara — that’s a legacy concept from Cascade. In Niagara, beams are simply ribbons with specific logic.
Learn More at More VFX Academy
Thank you for reading, we appreciate it. We will be happy to provide you with a promo code for a 20% discount on our courses: VFXLEGENDS20
If you want to dive deeper into real-time VFX, master Niagara, and learn how to create professional effects that are not only stunning but also optimized — join our course at More VFX Academy.
🎓 Inside the course:
65+ hours of video content
Hands-on assignments and real-world VFX cases
Full breakdowns of stylized, realistic, and performance-friendly effects
Community feedback, support, and certification
🚀 Whether you’re a beginner or a working artist — we’ll help you level up your skills and build a VFX portfolio that stands out.
👉 Visit More VFX Academy and start your journey to becoming a real-time VFX pro!
great guide. but it seems that nothing is mentioned on how to implemented Niagara in a optimized way. Such as Scalability: Effect Types
Thank you, yes, you are right, there will be a second part that will show how to do it in practice
that is fantastic to hear! thank you
slight maths correction… for a 2048 x 2048 image atlas 4×4 is not 128×128 individual tiles.. its 512 x 512… but great write up nonetheless , thanks for sharing !
Ohh, you’re right, thanks for the correction. Glad you liked the article!